
This guide teaches the various dimensions and guidelines for creating CD album covers that meet industry standards.
by Chris Huff of Disc Makers Blog
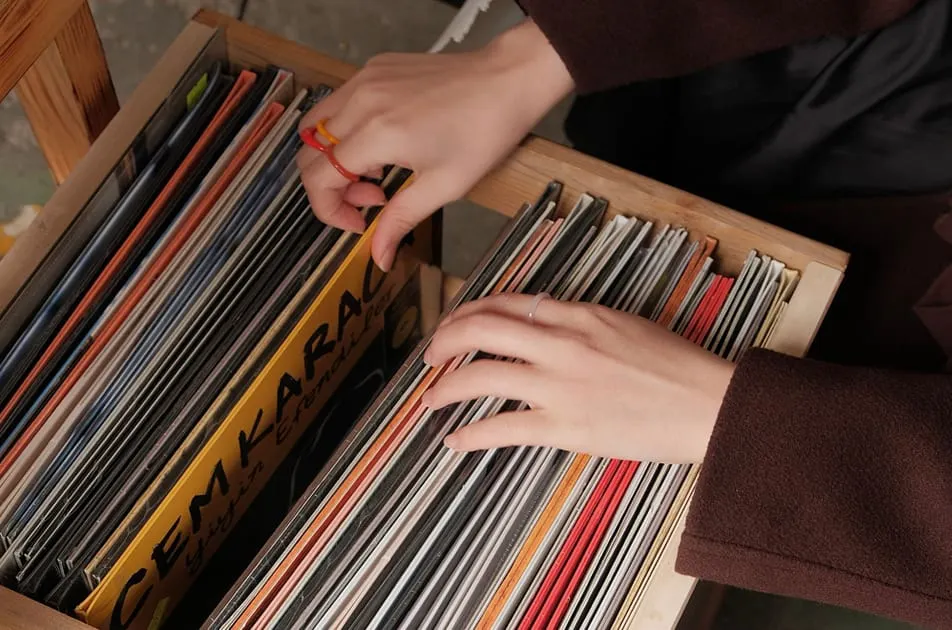
When learning how to make an album, it’s no exaggeration to say that front cover artwork is extremely important. While it may not be as important as it was in the old days when people would often purchase an album based on the artwork alone in a brick-and-mortar store, the album cover art still provides a visual image from which to build your web presence and for fans to get an idea of what your music is about.
If you’re pressing CDs, it’s important to know how the album artwork will look on the finished product. There are three standard CD album cover size options available to you. Let’s dive in and learn more about each option, plus the ins and outs of designing an album art cover.
Understanding the three different sizes of CD Cover Art
Standard CD album cover sizes
All the sizes described below are the “trim size,” meaning this is the approximate size of the finished product. This applies to common CD cover types like digipaks, jewel cases, jackets, and more. If submitting your own album artwork, you’ll want it to be within the safety margins with appropriate bleed. Now that you know this, we’re ready to answer the question: What size is a CD album cover?
Jewel case covers
Jewel case insert covers are 4.75” x 4.75.” The tray card is 5.4” x 4.625” x .25.”
Digipak covers
The standard digipak CD album cover size, front and back, is 5.492” x 4.941.”
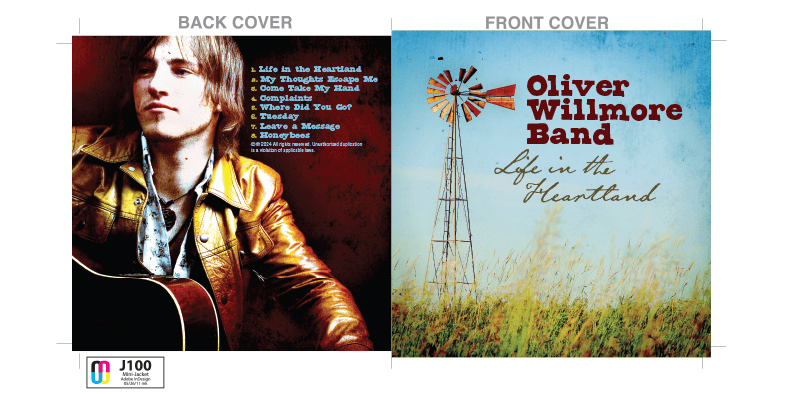
Sleeve and wallet covers
The standard jacket (J100) CD album cover size is 5.063” x 4.968.” Jackets with a tuck flap are 5.125” x 4.9375” with a back cover of 5” x 4.875.” Jackets with a glue strip are 5.125” x 5.125” on the front cover and 5” x 5.125” on the back cover.
The 4 panel eco-wallet front and back covers are 5.5” x 5.” There are 4- and 6-panel eco-wallets in jewel box size, and the front and back covers are 5.563” x 4.938.” There are also a variety of 4-and 6-panel eco-wallets available in special configurations; their measurements are available in Disc Makers’ disc package templates.
Designing your CD album cover
It’s essential to consider not only the aesthetic appeal, but also the practical aspects that affect the final print quality. Understanding the bleed and safe area will ensure that your album cover artwork is both striking and professionally produced. These elements are vital in the printing process to accommodate any slight variations during the cutting phase, protecting your design from any potential mishaps.
Understanding bleed and safe area
“Bleed” refers to the extension of any color, photo, or design elements past the cut line. In custom printing, printed pieces are trimmed in stacks of hundreds at a time, and the bleed gives the print shop a margin of error while trimming. “Safety margin” is the opposite of bleed; it’s represented by green lines on the Disc Makers templates. It is recommended to keep your important text and images at least 1/8” inside the safety margin to avoid anything being cut off. This is a crucial concept to understand when you are determining the size of a CD album cover for your project.
Resolution and file format
All of your images should be 300 ppi, 1200 ppi for line art. Saving at a higher resolution than 350 ppi will not produce a better printed piece. If you are submitting your artwork yourself, there are three options. For directly uploaded artwork, the preferred format is PDFs created in a design program where the images have been aligned in the Disc Makers templates (saved as a layer). If you use the design online option, you can upload PDF, jpeg, or png file types and size them to the templates. The third option is to use Advanced Graphic Services (AGS). For an additional fee, they will adjust your files and fit them into the templates. Files for AGS can be in jpeg, Illustrator, InDesign, or Photoshop formats.
Incorporating Disc Makers templates
Self-submitted artwork needs to be designed using the Disc Makers templates. The templates should be on a separate layer in your design program and then removed/hidden when the finished artwork is submitted. Otherwise, you will run the risk of crucial design elements being cut off during printing.
Uploading your album cover design to Disc Makers
After creating and formatting your great album cover, how do you send it to our professionals?
Checklist before uploading your design
Making sure your CD album cover size is correct for your project should be a top priority. If you are submitting your artwork yourself, make sure the images are high resolution with all important text and design elements are at least 1/8” within the safety margin. And, check that the appropriate bleed has been provided to ensure less errors in cutting.
Common mistakes to avoid in your design files
As we’ve emphasized, make sure you’ve properly sized your artwork. Improper sizing will lead to design elements being cut off. Low-resolution images will be pixelated and will look awful. The printing process is done in CMYK coloring — not RGB; you and your designer will need to make sure you’ve set your design program for CMYK. Make sure to read and be aware of the differences between on-disc printing and package printing.
Step-by-step guide to uploading your design
In order to upload your artwork, you will need to create a quote or get a quote from your Disc Makers product specialist. Then you can upload your disc content and CD/DVD packaging artwork through your account, keeping in mind the three possible uploading options discussed above. Once done, you will be able to view packaging proofs; these are in 3D for the most-popular packages.
How we ensure design compliance
Our prepress team will review the submitted files and confirm that they are compliant based on this criteria: size, bleed, resolution, barcode legibility, font legibility, template layers being removed, and verifying that essential elements are within the safety margins. Minor adjustments will be made if necessary, and if possible, you will be emailed new proofs to approve. Prepress does not proof for typos or content — only printability issues.
What happens after you upload your design
Once you have uploaded your designs, you will receive a digital proof of your artwork as it will appear on the final product. If you are using the web-based design tool, you will receive proofs almost instantly after submitting your files. These proofs MUST be approved by you in order for your project to proceed to manufacturing. Check your proofs thoroughly for any errors, even and especially after prepress has reviewed them. What you approve is exactly what will go into production. If you are concerned about color or print quality, you can pay an additional fee for a hard copy proof to be printed and mailed to you.
Tips for a successful CD album cover
Creating CD cover art involves more than just aesthetic appeal; it requires a strategic blend of visual impact, effective use of text and typography, and often, the expertise of a professional designer. A compelling album art instantly grabs attention, communicates the essence of the music inside, and creates a lasting impression.
In this section, we will explore essential tips that can elevate your album cover from ordinary to extraordinary. Whether you’re designing it yourself or collaborating with a professional, these guidelines will help ensure that your album stands out in a crowded market.
Maximizing visual impact
While we have talked a lot about CD album cover size, it’s really the artwork itself that will make an impact on your listeners. Think about the covers of your favorite albums —which ones are the most memorable for their artwork alone? One thing they all have in common is that the cover art is connected to the music inside. All the great album covers are a visual representation of the vibe and sound of the album. Choose your cover image carefully and take time to consider what your sound looks like if it’s distilled in an image. Summon your synesthesia (the ability to experience sensory information in multiple senses) — even if this does not come naturally to you!
Text and typography
For those unaware of the power of fonts and layout, take a look at the covers for Weezer’s Blue Album, the first Elvis Presley album, Prince’s Purple Rain, and any one of hundreds of the great album covers. It’s important to choose your fonts wisely and make sure that all fonts are clear and legible. One common mistake is putting fonts over dark backgrounds so the text cannot be read (even professionals make this mistake).
Working with a professional designer
The phrase “you get what you pay for” is not always true, but when it comes to designing your album cover it is 99% of the time worth it to hire a professional designer. Someone with prior experience designing album covers will avoid common mistakes and have a strong sense of how to portray your sonic ideas with visual images. Keep in mind that often the artists best suited to design cover images are not necessarily the ones best at laying out projects into the templates. You might want to hire one person to design the cover/package and someone else to lay it out (or do the layout yourself).
One way to find graphic designers is by finding out who designed the album covers you like and getting in touch with them. You might be surprised at how easy it can be to hire someone who’s worked with major artists. Another option is to use The Design Studio at Disc Makers, which might be the more affordable way to go. The Design Studio will work with you until your album package is exactly the way you want it.
Leveraging Disc Makers for your album production
When you work with Disc Makers, it’s an easy all-in-one process. You can bring your mixed CD and unfinished artwork and, using The SoundLAB and The Design Studio, create a fully mastered and professionally designed CD or vinyl record. Alternatively, you can bring a finished master and ready-to-print artwork designed in our templates — we will press what you give us!
Chris Huff has been a professional singer, multi-instrumentalist, songwriter, and producer for over 25 years. He has worked as a sideman with Peter Yarrow (Peter, Paul, and Mary), Echo and the Bunnymen, Chuck Hammer (David Bowie, Lou Reed), and Tom Kitt (Broadway composer of Next To Normal). Chris also wrote liner notes for David Bowie’s Live And WellCD, and his full-length album, ’bout Time is available on iTunes.